Gaumard BP Training System (S415 / S415.100)
v17.8.1 Manual- INITIAL SETUP
- CARE AND CAUTIONS WHEN UNBOXING
- Lift the arm from the box and remove the bag it is shipped in.
- Rest the arm on a bed or clean, lat surface near an electrical outlet.
- PACKAGE CONTENTS
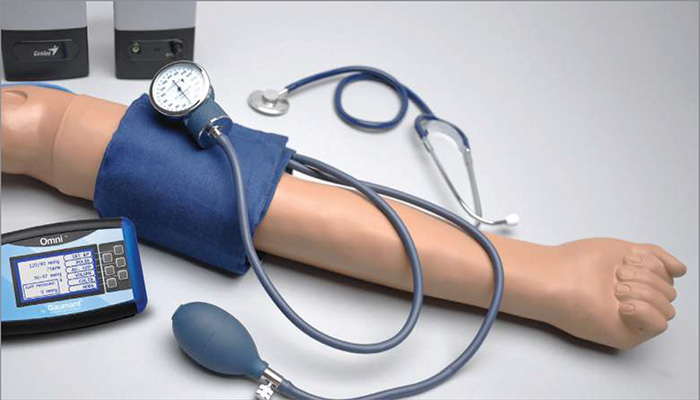
- Blood Pressure Training Arm
- Modiied Blood Pressure Cuf and Stethoscope
- Power Supply
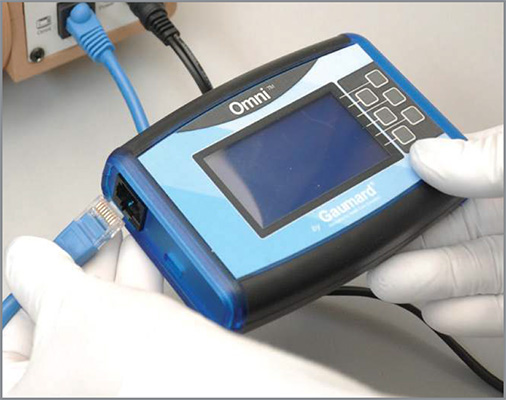
- OMNI® Controller
- Soft Carrying Bag
- External Speaker Set (for S415.100)
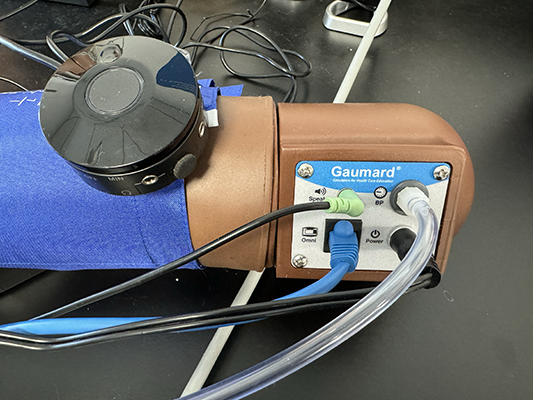
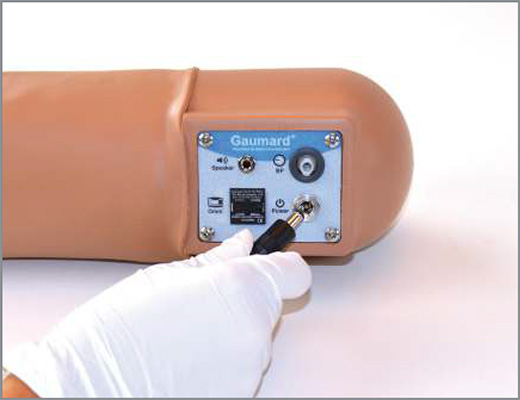
- CONTROL PANEL
- Speaker
- BP
- OMNI
- Power
- CONNECTING THE POWER SUPPLY
- A control panel in the shoulder of the arm consists of all the blood pressure arm adapters. Each adapter is labeled.
- Connect the power supply to a wall outlet and then connect the cable to the power input in the arm's control panel.
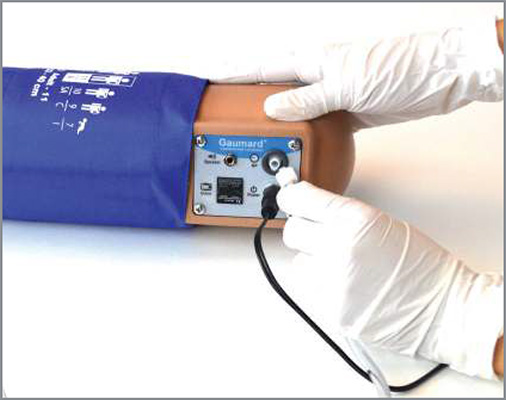
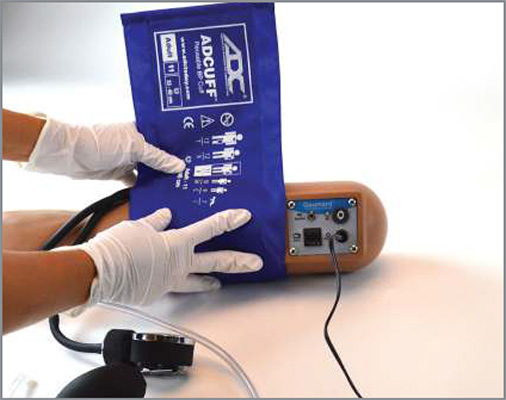
- CONNECTING THE MODIFIED BLOOD PRESSURE CUFF
- Wrap the blood pressure cuf around the arm above the elbow.
- Connect the blood pressure cuf extension to the adapter labeled BP on the control panel.
- COMPLETED EQUIPMENT SETUP
- Once You have completed the setup for the arm module should have:
- Green Speaker Cable Connected.
- Clear BP Cuff Connected.
- Blue Ethernet Cable Connected.
- Black Power Cord Connected.
- Speaker should be plugged into an outlet, and the hocky puck volume knob should show a Blue LED.
- Ensure that both the volume on the speaker and the volume on the hocky puck are set to 50%.
- Ensure that the arm power cable is plugged into an outlet.
- CALIBRATING THE BLOOD PRESSURE ARM
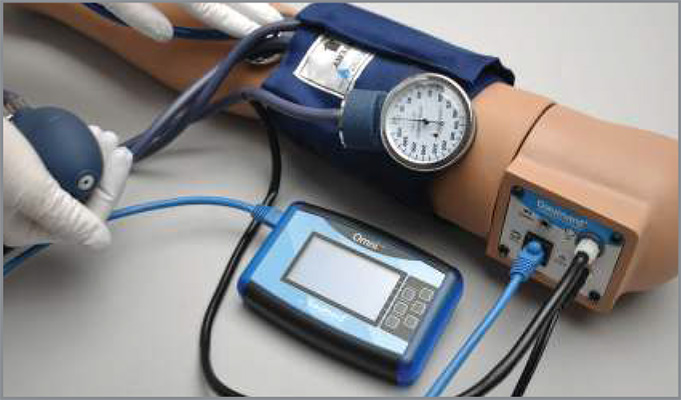
- Connect the OMNI® controller to the BP arm.
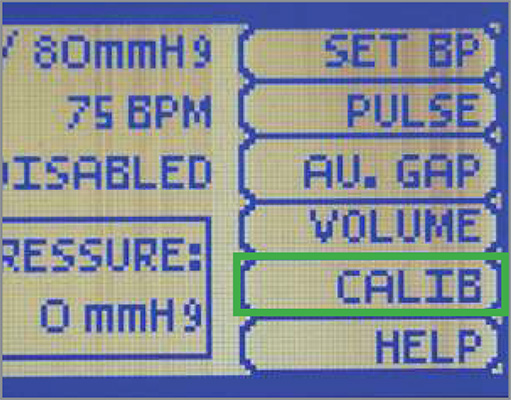
- Select the CALIB menu from the main screen and press NEXT to begin the calibration procedure.
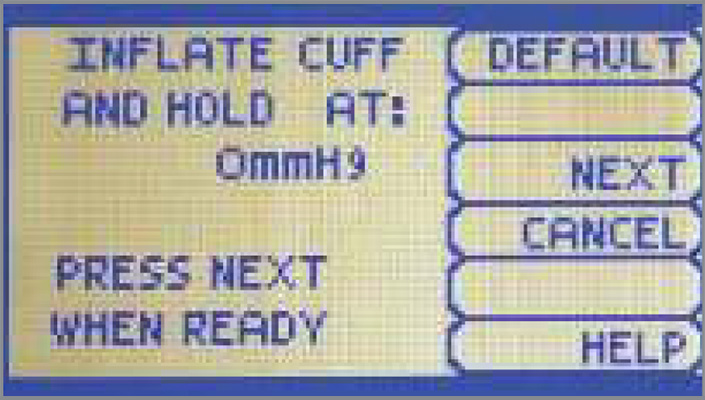
- OMNI® will display a prompt to set the BP cuf to 0mmHg then press NEXT.
- Do not inlate the cuff until prompted.
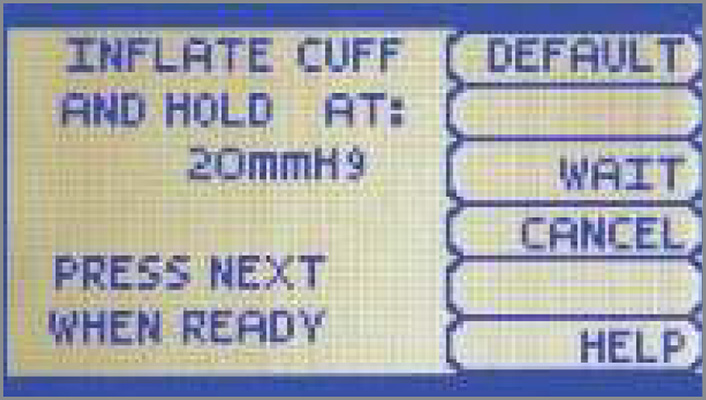
- OMNI® will prompt you to set the BP cuf to 20 mmHg. Increase the BP cuf pressure when the display prompts you to inlate the cuf one value at a time.
- Continue to press NEXT after setting each increment. After calibrating the sensor, OMNI® will return the main screen and display the reading shown on the sphygmomanometer.
NOTE: Make sure to orient the cuf where the arrow on the cuf points toward the elbow.